
In the last year every time I have dabbled more and more in the devops culture, to be more exact in the ops area(operations). Taking the first steps with Docker until reaching the use of orchestrators such as Kubernetes or Rancher, every day I discover new tools and procedures to carry out routine tasks.
In some occasions for simple tasks we use tools of great requirements, when there are others that are simpler and less complex.
In this post I’m going to talk about Webhooks, what they are used for and how amazingly useful they can be in your applications.
Webhook is not an API
First of all it is good to make clear that there is a big difference between a Webhook and an API. A different result is obtained from each one.
An API will request data
An API is basically a way to ask a question to another separate application. For example, if I was developing an application and I wanted my users to be able to find the people they follow on Twitter, I could ask the Twitter API, “Give me a list of all of the people this user follows on Twitter”.
An API is a common interface between two different applications. In the example above, it doesn’t make a difference if I write my application in Ruby and Twitter is written in Java because the API transmits and receives data in a common format (usually JSON or XML).
A Webhook will receive data
A Webhook is basically a way to be notified when an event has occurred, usually not due to a direct action from your application.
Say I had created an application for my company that used an API to track when people checked in. When a user checks in our application I want to be notified. Using an API I would have to be constantly asking “Is anyone more had checking?” because if I didn’t ask the question I would never find out. This is very inefficient because my application would have to ask every couple of seconds and for the majority of the time the answer would probably be no.
A Webhook on the other hand would instead notify me when someone had checked in by sending me a request saying “Hey, someone new has just checked in”. This would allow me to run any processes I had in my application for such an event.
What is a Webhook?
A Webhook is basically just a POST request that is sent to a specific URL. That URL is set up to receive the body of the POST request and process it in some way. Your endpoint would then be able to consume this object and run any processes that you might have.
Some companies that offers webhooks as parts of their services are MailChimp, SendGrid, Stripe and Shopify.
My own webhook
In the case that we want to install our own webhook service, there is a tool with the same name developed by Adnan Hajdarević in Go language.
Webhook, as its author describes it:
…is a lightweight configurable tool written in Go, that allows you to easily create HTTP endpoints (hooks) on your server, which you can use to execute configured commands. You can also pass data from the HTTP request (such as headers, payload or query variables) to your commands. webhook also allows you to specify rules which have to be satisfied in order for the hook to be triggered.
webhook aims to do nothing more than it should do, and that is:
- Receive the request
- Parse the headers, payload and query variables
- Check if the specified rules for the hook are satisfied
- And finally, pass the specified arguments to the specified command via command line arguments or via environment variables.
Everything else is the responsibility of the command’s author.
Building from source
To get started, first make sure you’ve properly set up your Go 1.12 or newer environment and then run
$ go get github.com/adnanh/webhook
Debian or Ubuntu
You can install webhook using
$ sudo apt-get install webhook
this will install community packaged version.
Configuring webhook
We configure the webhook daemon, creating the file /etc/webhook.conf with the following content (see the webhook documentation for more details):
[
  {
    "id": "project",
    "execute-command": "/opt/miscript.sh",
    "command-working-directory": "/tmp/",
    "trigger-rule": {
      "match": {
        "type": "payload-hash-sha1",
        "secret": "mysecret",
        "parameter": {
          "source": "header",
          "name": ""X-Gitlab-Token""
        }
      }
    }
  }
]
This will create a new hook called project, that will be triggered when a GET or POST request is received on http://localhost:9000/hooks/project. When triggered, it will check that a valid X-Hub-Signature HTTP header has been provided, and then launch the /opt/miscript.sh script from the /tmp working directory.
To compute the X-Hub-Signature corresponding to the mysecret secret
$ echo -n "" | openssl sha1 -hmac "mysecret"
(stdin)= 33f9d709782f62b8b4a0178586c65ab098a39fe2
Now try it:
$ curl -X POST -H "X-Hub-Signature: sha1=33f9d709782f62b8b4a0178586c65ab098a39fe2" -v http://localhost:9000/hooks/project
...
> POST /hooks/project HTTP/1.1
> Host: localhost:9000
> User-Agent: curl/7.64.0
> Accept: */*
> X-Hub-Signature: sha1=33f9d709782f62b8b4a0178586c65ab098a39fe2
>
< HTTP/1.1 200 OK
< Date: Mon, 26 Aug 2019 13:45:09 GMT
< Content-Length: 0
<
GitLab configuration
In order to trigger a webhook on every new push, go to the GitLab project settings, then “Integrations”, and create a new webhook with the following parameters:
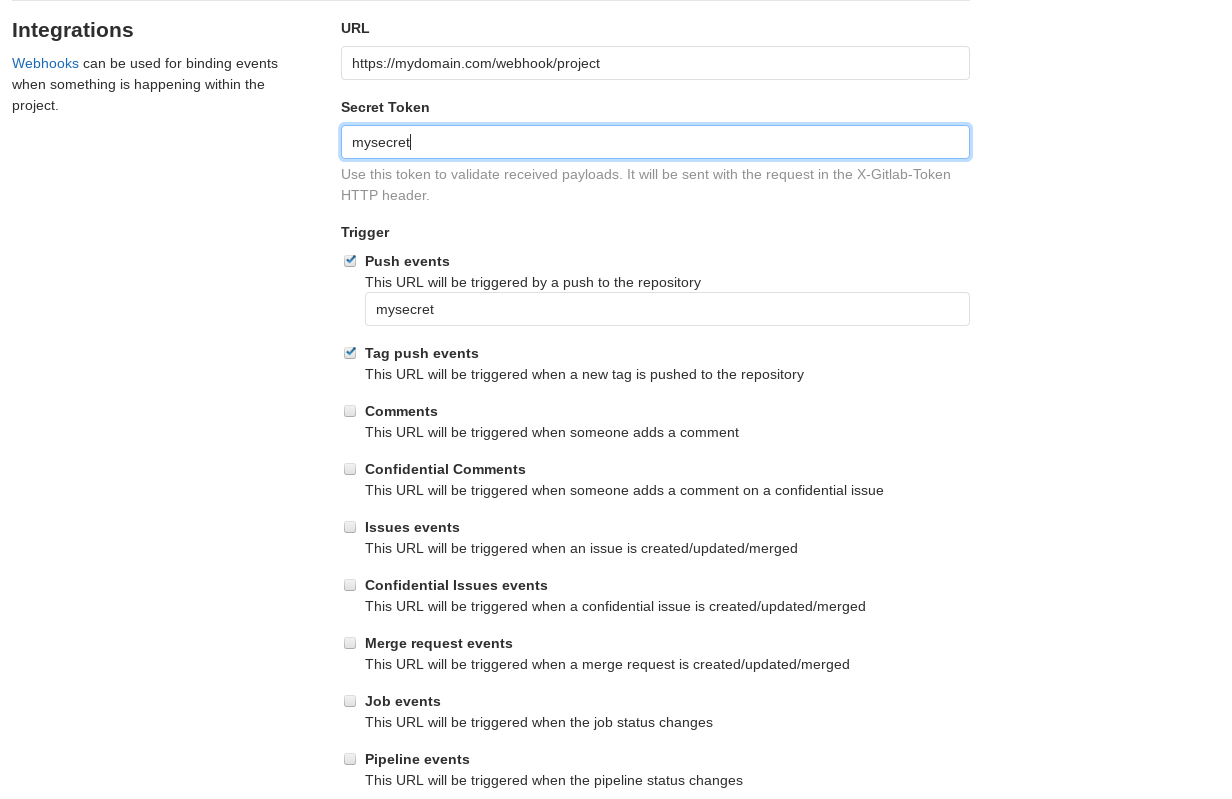
- URL: https://mydomain.com/webhook/project
- Secret Token: mysecret
- Select which events would you like to trigger this webhook: Just the push event.
GitHub alternative
The configuration in /etc/webhook.conf changes a bit:
[
  {
    "id": "project",
    "execute-command": "/opt/miscript.sh",
    "command-working-directory": "/tmp/",
    "trigger-rule": {
      "match": {
        "type": "payload-hash-sha1",
        "secret": "mysecret",
        "parameter": {
          "source": "header",
          "name": "X-Hub-Signature
        }
      }
    }
  }
]
Note: the X-Hub-Signature
Go to the GitHub project settings, then “Webhooks”, and create a new webhook with the following parameters:
- Payload URL: https://mydomain.com/webhook/project
- Content type: application/json
- Secret: mysecret
- Select the events would you like to trigger this webhook: Just the push event.
In this way, for each push action that we perform in the repository, our webhook will automatically activate our myscript.sh script on the server.